How Does A Pellet Grill Work? Pellet Grills Explained
A complete guide to pellet grills — what happens inside, how the controller holds temperature, what the pellets are made of, what these cookers are genuinely good at, what they are bad at, and everything that goes wrong.
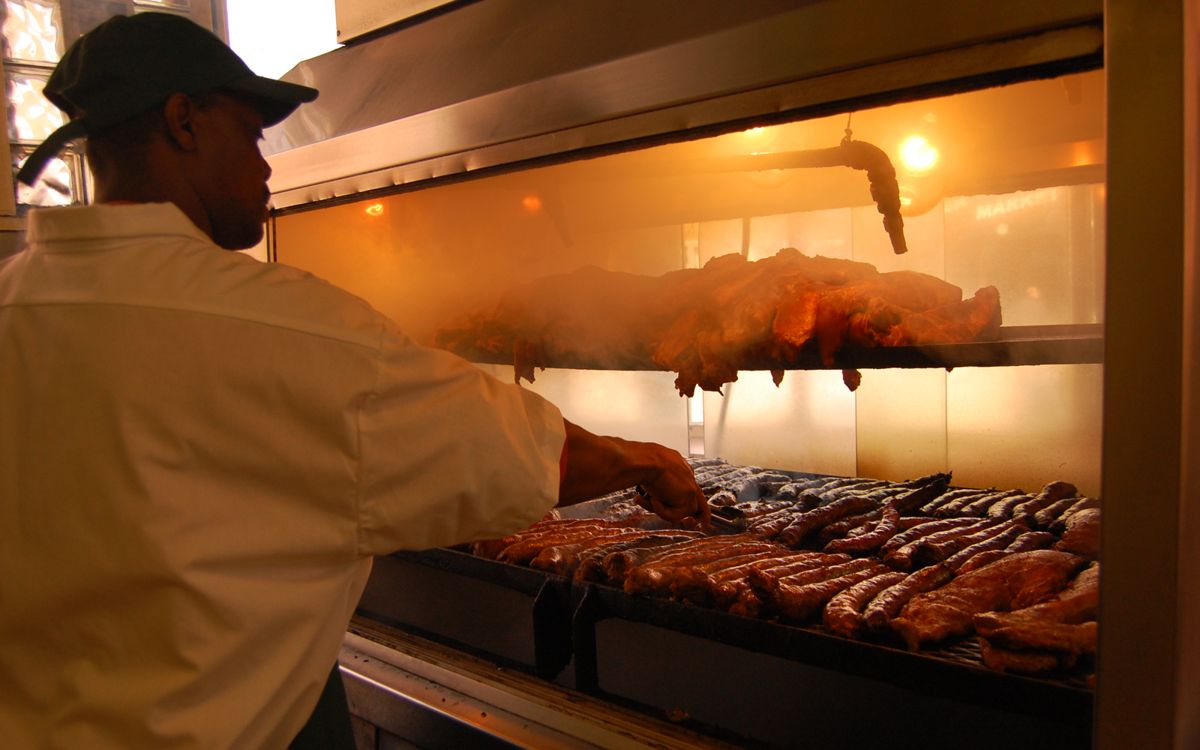
A pellet grill is a wood-fired oven with a thermostat. That single sentence explains almost everything about how it behaves, what it does well and where it disappoints people.
You set a temperature. A motor feeds compressed wood pellets into a small fire. A fan keeps that fire burning and pushes the hot air and smoke around the cooking chamber. A sensor tells the controller how hot it is, and the controller adjusts the feed rate to match the number you asked for.
It is closer to a convection oven that happens to burn wood than it is to a barbecue. Understanding that is the difference between being pleased with one and being disappointed.
What is inside
Every pellet grill, from the cheapest to the most expensive, has the same parts doing the same jobs.
The hopper
A container on the side, holding anything from four to nine kilograms of pellets. It feeds by gravity down into the auger tube. Hopper size decides how long you can leave the thing alone, and nothing else.
The auger
A long metal screw in a tube, driven by a small geared electric motor. As it turns, it drags pellets from the bottom of the hopper along to the fire pot. It runs in short bursts, not continuously. That burst pattern is how the controller adds fuel in measured amounts.
The auger is the part most likely to give trouble, and almost every problem people have with pellet grills traces back to it or to the pellets going into it.
The fire pot
A small perforated metal cup, usually about the size of a mug, sitting under the middle of the cooking chamber. This is where everything burns. It is remarkably small — the entire fire in a large grill occupies less space than a coffee cup.
The holes in the sides let the fan blow air up through the burning pellets. Ash falls through or builds up in the bottom, which is why it needs emptying.
The hot rod igniter
An electric heating element that pokes into the fire pot. On start-up it glows red hot, around 500 to 600°C, and sets the first pellets alight. It runs for a few minutes only. Once the fire is established it switches off and takes no further part.
If a grill will not light, this is usually the reason. It is a cheap part and a straightforward replacement.
The induction fan
A blower under the fire pot. It does two jobs at once, and both matter.
It forces air through the burning pellets, which is what lets such a small fire produce so much heat. And it drives the hot air and smoke up into the cooking chamber and around the food. There is no natural draught doing this work — the fan is the whole air system.
This is why a pellet grill will not work without mains power. Lose the electricity and the fire goes out.
The heat diffuser and drip tray
Above the fire pot sits a metal plate, sometimes called a flame deflector or drip pan. It stops the flame licking the food directly and spreads the heat sideways so the chamber warms evenly.
Above or as part of that sits a sloped grease tray, which catches fat and runs it out to a bucket on the side.
These two components are why a pellet grill cannot sear well as standard, and why grease management matters so much. More on both below.
The controller
The brain. It reads a temperature sensor in the cooking chamber and decides how often to run the auger and how fast to spin the fan.
The quality of this one part separates a good pellet grill from a frustrating one, and it is worth understanding properly.
The temperature probe
Usually an RTD sensor — a small metal probe on the chamber wall. It measures the air temperature at that one spot, which is not necessarily the temperature where your food is sitting. Chambers can vary by 15 to 30°C from one end to the other.
The start-up sequence, step by step
Knowing what should happen makes it obvious when something has not.
- You switch on and set a temperature. The controller powers the hot rod and starts the fan.
- The auger runs a priming cycle, dropping an initial charge of pellets into the fire pot. On a cold, empty auger this can take several minutes because the tube is empty and has to fill.
- The pellets catch. You get thick white smoke for a few minutes. This is smouldering, not clean burning, and it tastes acrid. It clears as the fire establishes.
- The hot rod shuts off and the fire is self-sustaining, fed by the auger and kept alight by the fan.
- The chamber comes up to temperature — typically ten to fifteen minutes, longer in cold weather.
- The controller settles into its cycle, feeding pellets in bursts to hold the number you set.
Do not put food on during the white smoke phase. Wait for the smoke to go thin and blue. That is a small habit that makes a large difference to how things taste.
How the temperature is actually held
This is where cheap and good pellet grills genuinely differ, and it is not marketing.
On-off controllers
The simplest type. The controller feeds pellets on a fixed timed cycle — so many seconds on, so many off — chosen for the temperature you set. It does not really respond to what is happening.
The result is temperature that swings. A grill set to 110°C might wander between 95 and 135°C. For a long, slow cook this is tolerable, because the meat responds to the average rather than the peaks. For baking, it is a problem.
PID controllers
PID stands for proportional, integral, derivative. In plain terms, it is a control method that looks at three things: how far off the target you are, how long you have been off, and how fast the temperature is changing. It uses all three to decide the next pellet feed.
The effect is that it anticipates. Instead of overshooting and correcting, it eases up as it approaches the target. A good PID pellet grill holds within about 5°C of the set point.
If you intend to bake, or you care about repeatability, a PID controller is the single specification worth paying for.
Why the temperature still wanders
Even a good controller cannot fully compensate for some things.
Opening the lid. The chamber dumps its heat in seconds and the controller responds by feeding hard, which usually overshoots afterwards. Every peek costs you time and adds a temperature spike.
Cold and wind. Thin steel walls lose heat quickly. In winter a grill can struggle to reach its top temperature at all, and will burn far more pellets doing it.
Pellet quality. Different woods and different densities carry different energy per pellet. Changing brands mid-cook changes how the grill behaves.
A dirty fire pot. Ash build-up chokes the airflow, the fire runs poorly, and the controller compensates by dumping in more fuel.
What the pellets actually are
This matters more than most people expect, and there is one point here that is a genuine safety issue.
How they are made
Hardwood sawdust is dried, then forced under high pressure through a die. The pressure heats the wood and melts the lignin that is naturally in it. Lignin is the substance that makes wood stiff, and when it cools it sets and binds the pellet together.
That is the whole process. No glue, no binder, no additive. A proper cooking pellet is compressed wood and nothing else.
Cooking pellets versus heating pellets
Heating pellets, for pellet stoves, look almost identical and cost considerably less. Do not use them.
They are commonly made from softwood, from bark, from recycled timber, or from wood treated with binders and additives that are perfectly acceptable to burn in a stove flue and are not acceptable in food smoke. They are not made to food-grade standards and are not tested as such.
The saving is a few pounds a bag. The risk is putting unknown combustion products into food. This is the one rule in pellet grilling that has no exceptions.
Wood species and what they taste of
Oak. Medium, clean, unobtrusive. The best default and the base of most blends.
Hickory. Strong, bacon-like. The classic American barbecue flavour. Easy to overdo on poultry.
Mesquite. The strongest of the common woods, sharp and earthy. Good for beef in short cooks. Harsh over a long one.
Apple and cherry. Mild and slightly sweet. Excellent with pork and poultry. Cherry darkens the skin attractively.
Maple. Mild and sweet, very good with pork.
Pecan. Like a gentler hickory. Suits almost everything.
Alder. Very light. The traditional wood for fish.
Competition blends. Usually a majority of oak with some hickory and a fruit wood. There is nothing wrong with them and they are a reasonable everyday choice.
The species matters less in a pellet grill than in a stick burner, because there is less smoke overall. Do not agonise over it.
How many you will get through
Roughly, at low smoking temperatures around 110°C, expect half a kilogram an hour. At high temperatures, 230°C and above, expect one to one and a half kilograms an hour. Cold weather can double both figures.
A twelve-hour brisket at low temperature is therefore around six or seven kilograms of pellets — most of a standard bag.
Storing them
Pellets are compressed sawdust held together by set lignin. Water undoes that. A pellet that has taken up moisture swells, crumbles, and turns to sawdust in the hopper.
Sawdust in the auger is the single commonest cause of a jam. Keep pellets in a sealed container with the lid on, indoors, and do not leave them sitting in the hopper between cooks in damp weather.
To test a suspect bag: drop a pellet in a glass of water. A good pellet sinks and holds together for a moment. A ruined one breaks apart immediately.
The smoke question
This is the most common disappointment, and it is worth being straight about.
Why there is less smoke than you expect
Smoke flavour comes from incomplete combustion. A wood fire starved of oxygen smoulders and produces a great deal of flavourful smoke. A wood fire with plenty of oxygen burns cleanly and produces heat with comparatively little.
A pellet grill has a fan forcing air through a tiny fire. It burns efficiently by design. Efficient burning means less smoke.
So a pellet grill produces noticeably milder smoke flavour than an offset smoker burning splits of wood. Anyone telling you otherwise is selling something. The trade is real: you give up smoke intensity and you get temperature control and the ability to walk away.
Getting more smoke out of one
Cook lower. Below about 120°C the fire cycles more slowly and smoulders more between feeds. Most of the smoke you get is produced in the first few hours at low temperature.
Start cold. Put the food in while the grill is coming up to temperature. The messy early burn is not ideal, but the meat is coldest and takes on smoke best when its surface is cold and damp.
Keep the surface damp. Smoke compounds stick to moist surfaces. Spritzing helps, and this is the real reason people do it.
Use a smoke tube. A perforated metal tube filled with pellets, lit at one end, that smoulders alongside the food for several hours. It adds real smoke independently of the grill's own fire, and it costs very little. This is the most effective fix by a wide margin.
Some controllers have a super-smoke setting that deliberately makes the fire cycle badly at low temperatures. It works, within limits.
The smoke ring
The pink layer under the surface of smoked meat is not caused by smoke flavour and is not a sign of quality. It is nitric oxide from combustion reacting with myoglobin in the meat, which stops the pigment browning as it cooks.
It forms while the surface is still below about 60°C, so anything that keeps the meat cold and damp for longer gives you more of it. Pellet grills produce smaller rings than charcoal or stick burners because they produce less nitric oxide. It makes no difference to the taste.
What a pellet grill is genuinely good at
Long, unattended cooks. This is the reason to own one. A brisket or a pork shoulder needs ten to fourteen hours at a steady low temperature. On a pellet grill you fill the hopper, set the number, and go to bed. On an offset you get up every forty-five minutes all night.
Repeatability. The same settings give the same result. That sounds dull, and it is exactly what you want when you are cooking for people.
Baking and roasting. A PID pellet grill is a genuine outdoor oven. Bread, pizza, roast chicken, pies, whole vegetables. It happens to add a light wood flavour to all of them, which is usually welcome.
A wide temperature range. Most run from about 80°C to 250°C, so one appliance covers cold-ish smoking through to roasting.
Very little skill required. There is no fire management to learn. It is close to impossible to ruin a first cook.
What it is bad at
Searing. Most top out around 250°C, and the diffuser plate between the fire and the food means there is no radiant heat. You get hot air, and hot air does not brown a steak the way glowing coals do. Models with a sear zone or a removable section over the fire pot are better, but a cheap charcoal kettle will out-sear almost any pellet grill.
Smoke intensity. Covered above. Milder than any live-fire smoker.
Drying things out. The fan runs constantly, and constant airflow removes moisture from the surface of the food. Chicken skin in particular suffers. Water pans and higher-temperature finishes help.
Power dependency. No electricity, no cook. This matters if the reason you have one is self-reliance. A small generator or a battery inverter is the workaround, and the draw is modest once running — it is the igniter that pulls current, and only for a few minutes.
Cold weather. Thin walls, a small fire and a constant fan is a poor combination in winter. Consumption rises steeply and the top temperature falls.
Running cost. Pellets are more expensive per hour than lump charcoal and considerably more than gas.
Complexity. There is a motor, a fan, an igniter, a control board and a sensor. Every one of them is a thing that can fail. A charcoal kettle has nothing to break.
Working around the searing problem
Since the weak point is well known, so is the fix, and it produces better steak than a hot grill does anyway.
It is called the reverse sear. Cook the meat slowly at 110 to 120°C until it is about 10°C below the finished temperature you want. Then take it off, get something genuinely hot — the sear zone, a cast iron pan on the hob, a chimney of charcoal with a grate on top — and brown it hard for a minute a side.
The reason this works better than searing first is that the slow phase brings the whole piece to an even temperature, so you get edge-to-edge pink instead of a grey band under the crust. The smoke goes on during the slow phase, when the surface is cold and receptive.
A cast iron pan on a kitchen hob is a perfectly respectable second half. There is no requirement for the searing to happen outdoors.
Moisture, and why things dry out
The fan never stops. That constant airflow is what makes the temperature control possible, and it is also steadily removing water from the surface of whatever you are cooking.
Three things help.
A water pan. A tray of water in the chamber raises the humidity, evens out the heat, and slows surface drying. It costs nothing and helps most on long cooks.
Spritzing. A spray of water, cider vinegar or apple juice every hour keeps the surface damp. It helps smoke stick as well as slowing the drying.
Wrapping. Once the bark has formed and the meat has taken all the smoke it is going to take — usually around four hours — wrapping in foil or butcher paper stops further moisture loss entirely.
Chicken is the exception. Skin needs to dry out to go crisp, so leave it alone and finish it hot, around 200°C, rather than fighting for moisture.
The stall, and what to do about it
On any long cook of a large piece of meat you will hit the stall. The internal temperature climbs steadily to around 70°C and then simply stops, sometimes for hours, sometimes going slightly backwards.
Nothing is broken. The meat is sweating, and the evaporation from its surface is removing heat as fast as the cooker is adding it. It is exactly the same physics that keeps you cool when you perspire.
You have two choices. Wait it out, which gives the best bark and takes longer than you expect. Or wrap the meat tightly in foil or butcher paper, which stops the evaporation and pushes it straight through — commonly called the Texas crutch. Foil is faster and softens the bark. Butcher paper breathes slightly and preserves more of it.
The mistake is turning the temperature up. That does not solve the stall and does dry the meat out.
Cold weather
Pellet grills suffer in winter more than any other type of cooker, because thin steel plus a constant fan is a poor combination when it is freezing outside.
What actually happens: pellet consumption can double, the time to reach temperature stretches out, the top achievable temperature drops, and on a windy day the controller may never settle at all.
Insulation blankets are made for most popular models and genuinely work. They cut consumption substantially and let the grill hold its set point. If you cook outdoors through winter, this is the accessory to buy first.
Get it out of the wind. Wind removes far more heat than cold air does. A sheltered corner is worth more than several degrees of ambient temperature.
Allow much longer. A cook that takes ten hours in summer can take thirteen in January. Start earlier rather than turning the heat up.
Open the lid less. The recovery time in cold weather is far longer than you are used to.
Where to put it
A pellet grill produces flame, sparks on start-up and a great deal of hot air, and it needs mains power. That combination decides where it can go.
Keep it well clear of walls, fences, overhanging eaves and anything wooden — a metre is a sensible minimum, more at the back where the chimney sits. Never run one in a garage, a shed, under a carport or inside any covered structure, even with the door open. It produces carbon monoxide like any other combustion appliance.
Stand it on something non-combustible and level. Level matters more than people expect: a grill tilted towards the front will run grease the wrong way and pool it where it should not be.
Use a proper outdoor extension lead if you need one, rated for the load and unwound fully. And run it somewhere it will not be tripped over during a fourteen-hour cook.
What things cost to run
Worth knowing before you commit, because the running cost is the part people underestimate.
A standard bag of cooking pellets weighs around nine kilograms. At low smoking temperatures that is roughly eighteen hours of cooking. At high temperatures it is closer to seven.
So a long brisket cook uses most of a bag. A weekly roast chicken uses perhaps a fifth of one. Someone cooking most weekends through the year will get through a bag or two a month.
Buying pellets by the pallet in autumn is substantially cheaper per bag than buying them one at a time in summer, provided you have somewhere genuinely dry to keep them. Damp storage will cost you more than you save.
Electricity is trivial by comparison. The igniter draws real current for a few minutes; after that it is a small motor and a fan, and the running consumption is comparable to a couple of light bulbs.
Accessories worth having
A separate meat thermometer. The most useful thing you can buy. Chamber temperature tells you very little; internal temperature tells you when to stop. A leave-in probe with a wireless readout removes almost all the guesswork from long cooks.
A smoke tube. Cheap, and the most effective answer to the mild-smoke complaint.
An insulation blanket if you cook in winter.
A shop vacuum — or a small ash vacuum. Emptying the fire pot with one takes seconds. Doing it with a spoon does not get done.
Drip tray liners. Foil or purpose-made liners turn the worst cleaning job into throwing something away.
A decent cover. Rain in the hopper ruins pellets, and water sitting in the chamber rusts it.
What you do not need: proprietary cleaning sprays, pellet flavour variety packs, and most of the branded accessories. A vacuum, a thermometer and a brush cover almost everything.
What to cook first
Chicken thighs. Bone-in, skin-on, at 190°C for about forty minutes.
The reason is that they are cheap, they are difficult to ruin, they take on smoke well, and forty minutes is long enough to watch how your particular grill behaves without committing a whole day to finding out.
Use that first cook to learn three things: how long it really takes to come up to temperature, whether the chamber runs hotter at one end, and how the display temperature compares with a thermometer at grate level. Those three facts will inform every cook afterwards.
Then a pork shoulder. Eight to ten hours at 110°C, wrapped when the bark looks right, pulled at around 95°C internal. It is forgiving, it feeds a lot of people, and it is the cook that shows you what the machine is actually for.
Leave brisket until later. It is expensive, unforgiving, and the thing most likely to make a beginner conclude the grill is at fault.
How it compares
Against an offset smoker. The offset wins clearly on smoke flavour and loses clearly on effort. An offset needs tending every half hour and takes real practice. Choose the offset if the cooking is the hobby; choose the pellet grill if the eating is.
Against a kamado. The kamado is far better insulated, holds temperature superbly, sears brilliantly and needs no power. It requires more skill to set up and cannot be left as freely. It is also heavy and fragile.
Against gas. Gas is faster to start, cheaper to run and hopeless for smoke. Different appliances for different jobs.
Against a charcoal kettle. The kettle is cheaper, sears better and needs no power. It cannot hold a low temperature overnight without constant attention.
Against an electric smoker. The electric is cheaper and simpler and produces less smoke flavour still. A pellet grill does everything an electric smoker does and more.
What goes wrong, and why
The auger jams
Almost always sawdust from damp pellets, packed hard in the tube. Empty the hopper, vacuum it out, and clear the auger tube. Prevention is dry storage and emptying the hopper between cooks in wet weather.
Pellets bridge in the hopper
They form an arch over the auger opening and stop feeding while the hopper still looks full. The grill runs out of fuel with pellets visibly in it. Give the hopper a shake when you fill it and check the level around the auger, not the top of the pile.
Temperature swings badly
Check the fire pot for ash first — it is the usual answer. Then check for a dirty temperature probe, a wind exposure problem, or simply a basic on-off controller doing what it always does.
Flame-out
The fire goes out but the auger keeps feeding. The pot fills with unburnt pellets. This happens after a power interruption, a fuel run-out, or a badly choked pot.
This is the one that matters. If you now restart without clearing the pot, the igniter lights a pot heaped with fuel, that fuel gasses off, and the gas ignites all at once. The result is a bang that can blow the lid open. People have been hurt.
After any flame-out: switch off, let it cool, empty the fire pot completely, vacuum it, and only then restart. Never restart a grill with a full pot. Every manufacturer says this and it is the single most important safety instruction for these cookers.
Grease fires
Fat accumulates in the drip tray and on the diffuser. At high temperature it ignites. This is the other genuine hazard, and it is entirely preventable by cleaning.
If it happens: turn the grill off at the mains, close the lid, and leave it. Do not open it — you will feed it air.
It will not light
Usually a failed hot rod. Check whether it glows on start-up. It is an inexpensive part and a simple job on most models.
Temperature reads wrong
Chamber probes drift and get coated in grease. Clean it. Then check the real temperature at grate level with a separate thermometer — most people find their chamber runs different from what the display claims, and knowing the offset is more useful than trying to correct it.
Keeping it working
After every cook. Brush the grates. Look at the grease bucket.
Every three or four cooks. Vacuum the fire pot. This is the single most valuable maintenance job on the whole machine and takes two minutes.
Every month or so. Scrape the diffuser and drip tray properly. Wipe the temperature probe. Vacuum the bottom of the chamber.
Every year. Empty and vacuum the hopper and auger tube. Check the fan is clear. Inspect the gaskets and door seal. Look at the igniter.
Between cooks in damp weather. Empty the hopper into a sealed tub. This one habit prevents most auger problems.
What to look for if you are buying
A PID controller. The one specification worth paying for. Ask directly; some sellers are vague about it.
Hopper size. Decides how long you can leave it. Anything under five kilograms will need attention during an overnight cook.
Steel gauge and insulation. Heavier steel holds temperature better and uses fewer pellets. It shows up in the weight of the thing.
A sear option. Either a higher top temperature or a way to expose part of the grate to direct flame. Worth having if this will be your only outdoor cooker.
A grease system you can actually clean. Look at how you get at the drip tray. Some designs make the most important maintenance job unpleasant, and an unpleasant job does not get done.
Wifi. Genuinely useful for overnight cooks, and not essential. A separate wireless meat thermometer does most of the same work for less.
Parts availability. Augers, igniters, fans and control boards all fail eventually. Buy a brand that sells them.
Temperatures worth knowing
A pellet grill removes the fire management, which leaves the actual cooking as the only thing you still have to get right. These are the numbers that matter.
Chamber temperatures. Around 80 to 95°C is the smoke-heavy range, used for adding flavour rather than cooking quickly. 105 to 120°C is the standard low-and-slow band for brisket, shoulder and ribs. 150 to 175°C is a useful middle ground that halves the time at some cost in smoke. 190 to 220°C is roasting — poultry, joints, vegetables. Above 230°C is as close to grilling as most of these get.
Internal temperatures. Poultry needs 74°C throughout, and that is a food safety figure rather than a preference. Pork and beef joints cooked as a roast are done at 63 to 70°C depending on how you like them.
Brisket and pork shoulder are the exceptions to everything. They go to 90 to 96°C, far past the point at which any other meat would be ruined, because the point is not doneness but the breakdown of collagen into gelatine. That only happens at high internal temperatures held for a long time, and it is the whole reason those cuts take twelve hours.
Judge them by feel rather than by number. When a probe slides in with no resistance, like going into soft butter, it is ready. That can happen anywhere between 90 and 98°C depending on the animal.
Resting. Anything large benefits from an hour wrapped and out of the heat before slicing. A brisket can rest for four hours in a cool box and be better for it.
Is one right for you?
A pellet grill suits you if you want to cook large cuts slowly without spending the day tending a fire, if you value getting the same result every time, and if you would use an outdoor oven for roasting and baking as well as smoking.
It suits you less if searing steaks is the main thing you do, if you want the strongest possible smoke flavour, if you have no mains power where you cook, or if you specifically want a cooker with nothing electrical to fail.
For most people cooking for a family, the honest position is that it is the most useful single outdoor cooker available, and that it is worth owning a cheap charcoal kettle alongside it for the searing it cannot do. The two together cost less than one high-end grill and cover everything.
Common myths
"Pellet grills give you real wood-fired flavour." They give you some. Less than an offset. It is a mild, pleasant wood note, not a heavy barbecue smoke.
"You need to match the wood to the meat." Helpful at the margins, not important. Oak works with everything.
"A big smoke ring means a good cook." It means nitric oxide met myoglobin. It has no flavour.
"Heating pellets are the same thing cheaper." They are not, and this is the one myth that could actually hurt you.
"Set it and forget it." Mostly true, and it still needs a full hopper, a clean fire pot and dry pellets. Neglect any of those three and the forgetting part goes badly.
The short version
An auger feeds wood pellets into a small fire pot. A hot rod lights them, a fan keeps them burning and drives the heat and smoke around the chamber, and a controller adjusts the feed rate to hold the temperature you set.
What you get is an outdoor oven that burns wood and can be left alone for twelve hours. What you give up is searing heat and the deep smoke of a live fire.
Keep the pellets dry, vacuum the fire pot, never use heating pellets, and never restart after a flame-out without emptying the pot first. Do those four things and one of these will run for years.