Can You Make Sauerkraut In A Plastic Container? Will A Bucket Work?
Yes, in food grade plastic. Here is which plastics are safe with acid, why a deep bucket beats a shallow tub, how to weigh the cabbage down, what to avoid entirely, and how plastic compares with glass and crocks.
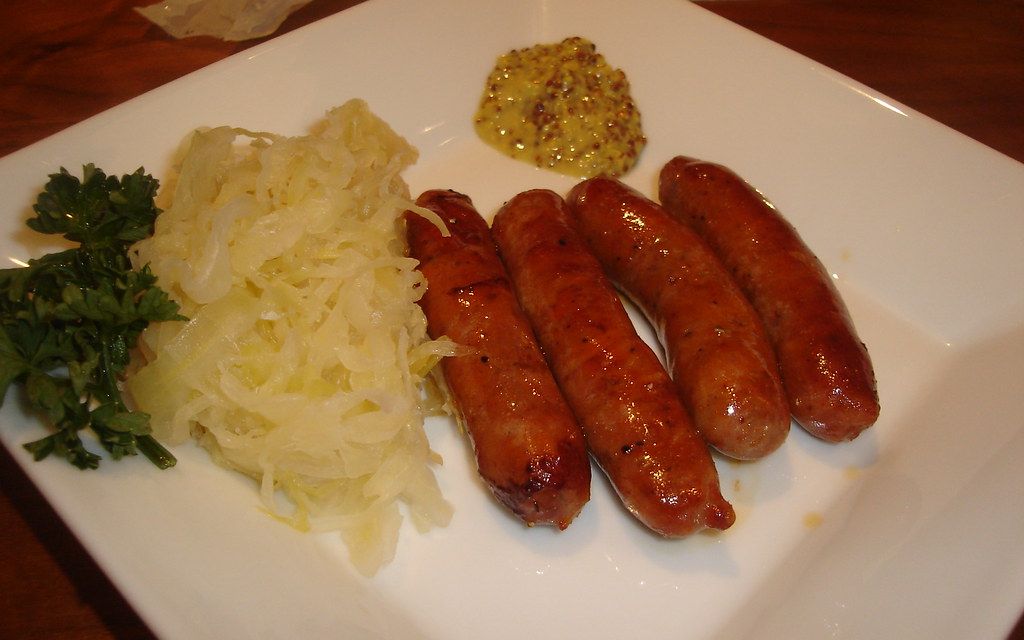
Yes. Food grade plastic is perfectly good for sauerkraut, and a food grade bucket is how most people make it in quantity.
Two conditions. The plastic must be food grade, and it must be the right kind of plastic for an acidic food sitting in it for weeks. Get those right and a bucket works as well as anything.
Which plastics are safe
Most plastic containers carry a recycling number in a triangle on the base. It tells you what the plastic is, and that decides whether it belongs anywhere near a ferment.
Use these
2 — HDPE, high density polyethylene. The standard for food grade buckets. Stiff, opaque, chemically stable and unaffected by acid. This is what almost every proper fermenting bucket is made from.
5 — PP, polypropylene. Also excellent. Common in storage tubs and lids. Handles heat and acid well.
4 — LDPE, low density polyethylene. Softer, used for flexible containers and bags. Safe for this purpose.
These three are inert, stable in acid, and contain no plasticisers to leach out. They are the correct choices.
Avoid these
3 — PVC. Contains plasticisers that can migrate into food, and acid encourages it. Not for long contact with food.
6 — PS, polystyrene. Brittle, and styrene can migrate. Not suitable for weeks of acid contact.
7 — Other. A catch-all category that includes polycarbonate, which is the BPA one. It also includes some perfectly good modern plastics, so 7 is not automatically bad — but it tells you nothing useful, and if you cannot identify it, do not use it.
1 — PET. Fine for a fizzy drink bottle, not intended for repeated use or long storage of acidic food. Thin, and it scratches easily.
Why acid changes things
A container that is fine for dry storage is not automatically fine for sauerkraut, and it is worth understanding why.
Sauerkraut finishes at around pH 3.4. That is properly acidic — comparable to orange juice — and it sits in the container for weeks, sometimes months, at room temperature. Salt at two per cent adds to the chemical load.
Acid attacks some plastics slowly, and where a plastic contains additives such as plasticisers, acid speeds up their migration into the food. Warmth accelerates it further.
HDPE and polypropylene have no such additives and are not attacked by food acids. That is why they are used for everything from milk bottles to vinegar containers.
What "food grade" actually means
It means the plastic is manufactured to a standard for food contact — no unapproved additives, no recycled content of unknown origin, and colourants approved for food use.
The marking to look for is a wine glass and fork symbol, or the words "food grade" or "food safe" moulded into the plastic. In the UK and Europe, food contact materials are regulated and the symbol means something.
The thing people get wrong: a bucket made from HDPE is not automatically food grade. A DIY bucket from a builders' merchant may well be HDPE and still contain recycled material, industrial colourants and mould release agents that were never intended to touch food.
Where to get proper ones: homebrew suppliers, catering suppliers, and bakeries. A bakery will often give away buckets that held icing or filling — those are genuinely food grade and have only ever held food. Wash them out, check the number on the base, and you have a fermenting vessel for nothing.
Never use: buckets that held paint, chemicals, cleaning products or anything non-food, however thoroughly washed. Plastic absorbs. You will not get it out.
Why a deep bucket beats a shallow tub
Shape matters more than most people expect, and it comes down to how much surface is exposed to air.
A tall, narrow container has a small surface area for the volume it holds. A wide, shallow one has a large surface area for the same volume.
The surface is where the trouble is. It is where mould lands, where kahm yeast forms, and where cabbage floats up out of the brine. Everything below the brine is protected; everything at the top is exposed.
So a ten litre bucket, tall and round, gives you a small circle of surface to look after. A wide storage box holding the same amount gives you several times as much.
Depth helps in a second way. A tall column of cabbage puts weight on the layers below, which helps keep everything compressed and submerged. A shallow layer has no such help.
If you can choose, choose tall.
Keeping it under the brine
This is the rule that decides whether a batch succeeds, and a wide bucket makes it harder than a jar does.
A plate and a weight. The traditional method. A plate that almost fits the bucket, laid on the cabbage, with something heavy on top — a sealed jar of water works well. The plate spreads the load and holds the edges down.
A brine-filled bag. The best method for a bucket, and it costs nothing. Take a strong food grade bag, fill it with two per cent brine, and lay it on the cabbage. It moulds itself to the shape of the container and seals the entire surface, edges included. Fill it with brine rather than water so that a leak does not dilute the ferment.
Outer leaves. Save a couple of whole cabbage leaves and lay them over the shredded cabbage before weighting. They act as a lid and catch anything that would otherwise float. Discard them at the end.
A purpose-made follower. A food grade disc sized for the bucket. Works well, and is what commercial fermenters use.
Whatever you use, check the brine level after a day. If the cabbage is not covered, top up with brine made at the same strength — twenty grams of salt per litre of water. Never top up with plain water, which dilutes the salt and weakens the protection.
Lids and gas
Fermentation produces carbon dioxide, and a lot of it in the first week. It must be able to escape.
Do not seal a bucket tight. A sealed container will bulge, and it can pop the lid off or split. Rest the lid on loosely, or clip it and leave a corner unfastened.
An airlock lid is the better answer. A bucket lid drilled and fitted with a grommet and a fermentation airlock lets gas out and nothing in. Homebrew suppliers sell them, they cost very little, and they remove most surface mould problems because air is never in contact with the ferment.
A cloth over an open bucket keeps flies out and lets gas escape, which is the simplest arrangement of all. It leaves the surface exposed to air, so it needs more attention.
The downsides of plastic
Plastic works. It is not the best material, and these are the reasons.
It scratches. Every scratch is somewhere bacteria can shelter from cleaning. A well-scratched bucket cannot be reliably sanitised. Use plastic or wooden implements in it, never metal, and retire a bucket once the inside is properly scored.
It holds smells. Plastic absorbs odours and does not give them up. A bucket that has made kimchi will smell of kimchi for the rest of its life. Keep a bucket for fermenting and do not use it for anything else.
It stains. Red cabbage and turmeric will colour a plastic bucket permanently. Harmless, but it never comes out.
It is light. A full bucket is heavy but the container itself is not, so it can be knocked over more easily than a crock.
You cannot see in. Most food grade buckets are opaque, so checking on progress means taking the lid off. A glass jar shows you the bubbles and the brine line without disturbing anything.
Plastic against the alternatives
Glass. Inert, stains at nothing, holds no smell, and you can see what is happening. The best material by a clear margin for small batches. Breakable, heavy, and impractical above a few litres.
Stoneware crocks. The traditional vessel, and they work superbly — thick walls even out temperature swings, and water-seal crocks have a moat around the rim that excludes air completely. Expensive and heavy. Avoid old or antique crocks unless you know the glaze is lead-free, because some older glazes are not and acid will draw lead out.
Stainless steel. Only grade 304 or 316. Those are genuinely non-reactive and excellent. Cheaper stainless will corrode in salt and acid, and it is often hard to tell what you have.
Food grade plastic. Cheap, light, unbreakable, available in large sizes. The practical choice for quantity.
A reasonable arrangement is glass jars for small batches and a food grade bucket when the cabbage comes in all at once.
What not to use at all
Aluminium. Reacts with acid and salt. It will corrode and put aluminium into the food.
Copper and brass. Same problem, worse. Copper is also antimicrobial, which is precisely what you do not want.
Galvanised or zinc-coated anything. Acid dissolves zinc, and zinc in quantity will make you ill. Old galvanised buckets are a genuinely bad idea.
Cast iron. Reacts, and it will ruin the seasoning.
Chipped or crazed enamel. Once the enamel is broken, the metal underneath is exposed.
Anything that held something else. Chemicals, paint, fuel, detergent. Plastic in particular does not let go.
The film that appears on top
In an open bucket you will almost certainly get something on the surface at some point. Two different things, with two different answers.
Kahm yeast is a flat, thin film — white, cream or slightly grey, sometimes wrinkled like the skin on cooled custard. It lies on the surface rather than standing up from it. It is harmless.
It is more common in a bucket than a jar simply because there is more surface for it to form on, and more common in warm conditions and in ferments low on salt.
Skim it off with a spoon, wipe the sides above the brine, check everything is still submerged, and carry on. If it keeps returning, the ferment is either too warm or too exposed to air, and an airlock lid solves both.
Mould is different and looks different. It is fuzzy and raised rather than flat, and it can be white, green, black, blue or pink. It grows in circular colonies.
Mould only appears where food has been in contact with air, which means something floated. If it is a small patch on the surface of a large bucket, remove it and the cabbage around it generously, check the smell of what is underneath, and make sure everything is properly weighted from now on. If it is widespread, or the batch smells wrong rather than pleasantly sour, throw it out.
A large bucket is worth more caution than a jar here, because there is more at stake and because you cannot see the sides. If in doubt about a big batch, it is not worth the risk.
Cleaning it properly
Hot water and unscented washing-up liquid, and a cloth rather than an abrasive pad — abrasives cause the scratches that cause the problems.
Rinse thoroughly. Detergent residue will interfere with the ferment.
To sanitise, use a homebrew sanitiser or a weak bleach solution — about a tablespoon of unscented bleach in five litres of water — left for a few minutes and then rinsed properly. Vinegar is a reasonable everyday alternative.
Dry it completely and store it with the lid off. A sealed damp bucket grows things.
How much fits
Useful for planning, because cabbage looks like more than it turns out to be.
Shredded and packed down, a kilogram of cabbage occupies roughly a litre. So a ten litre bucket takes about eight kilograms of cabbage once you allow headspace for the brine and the weight — somewhere around eight to ten average cabbages.
Leave at least a fifth of the bucket empty. Fermentation pushes brine up, and a bucket filled to the brim will overflow in the first week. Stand it on a tray.
Mistakes worth avoiding
Assuming any bucket is food grade. Check the number and check for the symbol.
Sealing the lid tight. Gas needs somewhere to go.
Choosing wide and shallow. More surface to police, for no benefit.
Weighting the middle only. The edges float and grow mould. A brine bag solves this completely.
Topping up with plain water. Dilutes the salt. Always use brine at the same strength.
Using a scratched old bucket. It cannot be cleaned properly. Retire it.
Reusing a bucket that held something else. Whatever it held is still in the plastic.
The short version
Food grade plastic is fine. Look for HDPE marked 2 or polypropylene marked 5, with a food grade symbol, and get buckets from a bakery or a homebrew supplier rather than a builders' merchant.
Choose tall and narrow over wide and shallow. Weigh everything down, and a brine-filled bag is the best way to do it in a bucket. Leave the lid loose or fit an airlock. Leave a fifth of the bucket empty and stand it on a tray.
Keep that bucket for fermenting only, because it will smell of the first thing you make in it forever.