Does Sauerkraut Need To Be Fully Submerged When Fermenting?
Yes, and it is the one rule that matters most. Here is why the brine line decides everything, what happens to cabbage that floats, six ways to keep it under, and what to do when it goes wrong.
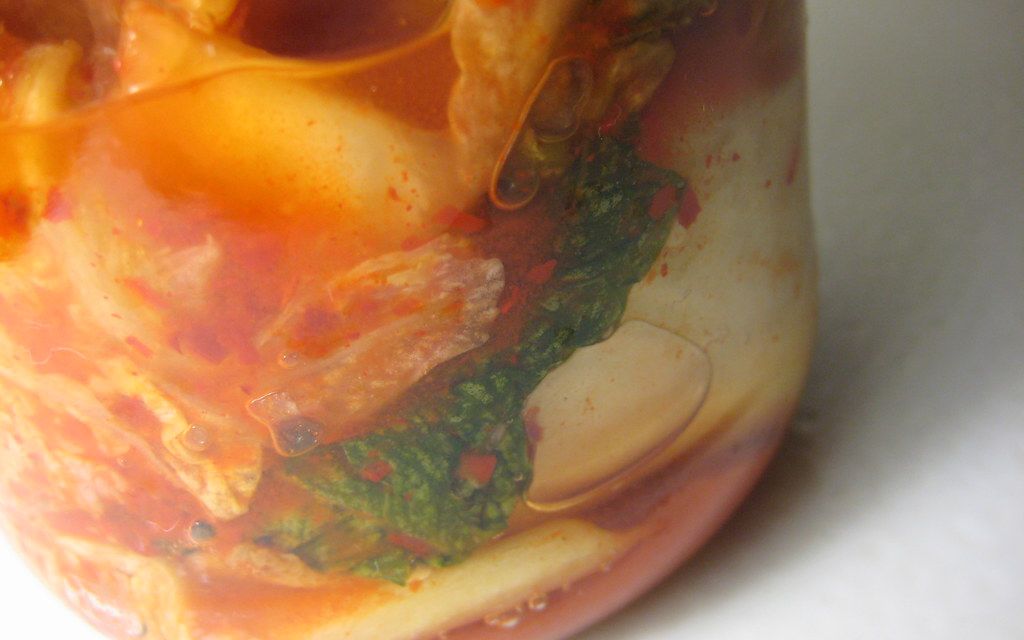
Yes. Everything must stay below the brine, and this is the single most important rule in vegetable fermenting.
Get the salt slightly wrong and you will still probably get sauerkraut. Get the temperature wrong and it will be too fast or too slow but still work. Let the cabbage float above the brine and you will get mould.
Almost every failed batch traces back to this one thing.
Why the brine line decides everything
It comes down to oxygen.
The bacteria you want are anaerobic or nearly so — they work without oxygen and are perfectly happy submerged in salty liquid. That is their environment and they thrive in it.
The organisms you do not want are mostly the opposite. Moulds need oxygen. So do most spoilage bacteria and the yeasts that form films. Deprive them of air and they simply cannot grow.
So the brine is not just liquid. It is a physical barrier that separates the two groups. Below it, only the useful organisms can operate. Above it, everything is possible.
This is why fermenting is safe without sterile equipment, without refrigeration and without any measurement more complicated than a set of scales. You are not trying to eliminate the unwanted organisms. You are putting them somewhere they cannot function.
A piece of cabbage sticking up above the brine has been taken out of that protection. It is sitting in open air, damp, at room temperature, for weeks. That is the definition of conditions where mould grows.
What happens to cabbage that floats
In order, over about a week.
It dries out and darkens. The exposed shreds go brown and leathery at the edges. This alone is not dangerous, but it is the first sign.
Kahm yeast forms. A flat white or grey film across the surface. Harmless, unpleasant tasting if left, and a signal that air is reaching the ferment.
Mould appears. Fuzzy and raised, in white, green, blue, black or pink. This is the point at which the batch is in trouble.
It softens and smells wrong. Spoilage organisms get established on the exposed material and work downwards.
The important detail is that this happens from the top down. Cabbage that has stayed submerged throughout is protected regardless of what is going on above it, which is why a small surface problem on a large batch is often recoverable.
Six ways to keep it under
All of these work. Which one you choose depends on the vessel.
A glass fermentation weight
A disc of glass made to fit a wide-mouth jar. Drop it in on top of the cabbage and it holds everything down.
Simple, effective, easy to clean, and it does not react with anything. The best option for jars, and cheap.
A smaller jar inside the big one
A jam jar filled with water, sitting inside a wide-mouth jar. It weighs the cabbage down and its own weight can be adjusted by how much water you put in.
Free, and it works well. Make sure the lid is on the inner jar so nothing gets in.
A brine-filled bag
The best method for any wide container, and particularly for buckets.
Fill a strong food grade bag with brine at the same strength as the ferment — twenty grams of salt per litre. Lay it on top. It moulds to the shape of the vessel and seals the entire surface including the awkward edges, which rigid weights never quite manage.
Fill it with brine rather than water so that if it leaks, it does not dilute the ferment.
A whole cabbage leaf
Save one or two of the outer leaves. Fold them over the shredded cabbage before adding a weight. They act as a lid and catch the small shreds that would otherwise work their way up.
Free, traditional, and it makes any other weight considerably more effective. Discard the leaves at the end.
A wooden or ceramic follower
A disc sized to the vessel, used in traditional crocks. Effective, and worth having if you ferment in quantity.
Avoid softwood, anything treated, and any wood that has been used for something else. Untreated hardwood is fine.
A water-seal crock
The traditional German and Chinese design. The crock has a moat around the rim, the lid sits in it, and water in the moat forms a seal that lets gas bubble out and lets nothing in.
Combined with proper stone weights, this is as close to foolproof as vegetable fermenting gets. Expensive and heavy.
When the brine level drops
It often does, particularly in the first week. Three reasons.
Overflow. Fermentation produces gas, and gas pushes brine up and out. A jar filled too full will lose liquid over the rim in the first few days. Leave a fifth of the vessel empty and stand it on a tray or plate.
Absorption. Dry cabbage takes up liquid. If the shredded cabbage was quite dry to begin with, the brine level falls as it soaks in.
Evaporation. Slow, and only a factor in a warm, dry room with an open vessel.
Topping up, correctly
Make brine at the same strength as the ferment: twenty grams of salt per litre of water. Weigh it. Add enough to cover.
Never top up with plain water. This is the mistake that follows the floating mistake. Plain water dilutes the salt below the concentration that gives the lactobacilli their advantage, and a weakly salted ferment goes soft and unreliable.
Use dechlorinated water if you can — left standing overnight, boiled and cooled, or filtered. Chlorine suppresses the bacteria you are relying on.
Add the brine cold, or at room temperature. Never hot.
Getting enough brine in the first place
Half of all submersion problems are really a shortage of brine, and that is decided before the cabbage goes anywhere near the jar.
Cabbage makes its own brine. Salt draws water out of the leaves by osmosis, and squeezing accelerates it. A kilogram of fresh cabbage with twenty grams of salt should produce enough liquid to cover itself with no water added at all.
Three things stop that happening.
The cabbage was old. A head that has been stored for weeks has already lost water and cannot give up what it does not have. Fresh cabbage is the single biggest factor, and home-grown cut the same day is best of all.
It was shredded too coarsely. Water comes out of cut surfaces. Fine shreds have far more surface than thick ones. If you are struggling for brine, shred finer next time.
It was not squeezed hard enough or long enough. Five minutes of serious work for green cabbage, ten to fifteen for red. Most people stop too early. If your hands tire, salt it and leave it for half an hour — the salt keeps working on its own — then come back to it.
Packing matters too. Press each handful down firmly as it goes in, rather than tipping the lot in loosely. Packing drives out air pockets and brings the liquid up to the top where you want it.
Checking without disturbing it
Every time you open a ferment you let air in, so it is worth being able to check on it without doing so.
A glass jar is a considerable advantage here. You can see the brine line, see the bubbles, see whether anything has floated, and see the colour changing — all without touching the lid. This is the strongest argument for glass over an opaque bucket for small batches.
What you are looking for over the first week: bubbles rising, the brine going cloudy, the level staying above the cabbage, and the colour dulling from bright green to a paler olive.
Cloudy brine is correct and catches people out. It is the bacteria themselves, in large numbers, and it is a sign of a healthy ferment rather than a problem.
Marking the brine level on the outside of the jar with a marker pen on day one takes a second and tells you at a glance whether it has dropped.
If something has floated
Assess before you act. Most of the time it is recoverable.
A few dried brown shreds, no film, no fuzz. Remove them, push everything back under, top up with brine if needed, and carry on. No further action.
A flat white or grey film. Kahm yeast. Skim it off with a spoon, wipe the vessel sides above the brine with clean kitchen paper, resubmerge everything and continue. Harmless.
A small patch of fuzzy mould on the surface of a large batch. Remove the mould and a generous margin of cabbage around and below it. Then smell what is underneath. If it smells clean and sour, and the rest was properly submerged, it is usually fine. If you are at all unsure, do not eat it.
Widespread mould, a bad smell, slimy texture, or pink discolouration through the batch. Throw it out. Pink or red slime through the body of a ferment is a specific sign of too little salt and the wrong organisms taking hold.
Judgement note: a small jar is easy to sacrifice, so err towards throwing it out. A large bucket is a bigger loss, which makes it tempting to save — resist that temptation, because the reasoning should not change with the quantity.
Why some ferments look like exceptions
Two cases confuse people.
Kimchi is often packed into a container without an obvious pool of brine on top. It is not an exception. Kimchi is packed extremely tightly, and the paste and the salted vegetables produce enough liquid to fill every gap. There is no air in the container, which achieves the same result by a different route. Kimchi packed loosely, with air pockets, does grow mould.
Some sealed-container methods rely on the carbon dioxide produced in the first day or two to displace the air entirely. This works, and it is what an airlock lid is doing more reliably. It is still an oxygen-exclusion method, not an exception to the rule.
In both cases the principle is unchanged: no oxygen in contact with the food. Brine is the usual way to achieve it, not the only way.
Airlocks, and whether to bother
An airlock is a small valve that lets gas out and lets nothing in. Fitted to a jar lid or a bucket lid, it means the space above the ferment fills with carbon dioxide and stays there.
They are inexpensive and they remove most surface problems, because kahm yeast and mould both need oxygen and there is none.
They do not replace weighting. Cabbage floating above the brine in an airlocked jar is still exposed to whatever is in the headspace, and while it will not mould as readily, it still dries and discolours. Weight it and airlock it.
Without an airlock, a loose lid works. Gas must be able to escape. A tightly sealed jar will build pressure, and a glass jar under pressure is genuinely dangerous.
If you do use a sealed lid, burp it daily in the first week — open it briefly to release the gas, then close it. Set a reminder, because forgetting is how jars break.
Mistakes worth avoiding
Weighting the middle only. A small weight in the centre lets the edges float, and the edges are exactly where mould starts. Use something that covers the whole surface.
Filling the vessel to the brim. Brine overflows in the first week and then there is not enough left to cover the cabbage.
Topping up with plain water. Dilutes the salt and creates a second problem.
Not checking for the first week. This is when the level moves most. Look at it daily for the first few days.
Assuming a full jar means a covered jar. Look at the brine line, not the cabbage line.
Sealing a jar tight and forgetting it. Pressure builds fast in the first days.
Stirring mould in. Never. Remove it, and remove the food around it.
The short version
Everything must stay under the brine, because the brine is what keeps oxygen away, and oxygen is what mould needs.
Weight the whole surface, not just the middle. A brine-filled bag is the best method in a wide vessel and a glass weight is the best in a jar. Leave a fifth of the container empty and stand it on a tray.
Check it daily for the first week. If the level drops, top up with brine at twenty grams of salt per litre — never with plain water.
Get this one thing right and very little else can go wrong.